Embed the Chat Widget on Your Website — Complete Guide
Build a branded chat widget, customize every visual detail, and drop it onto any website (WordPress, Webflow, LeadConnector, plain HTML) in under 5 minutes.
7 min readUpdated 2026-02-24
The Voxinity chat widget is a floating chat launcher you embed in the bottom-right corner of any website. Visitors click it, type a message, and get an instant reply from the same AI agent that powers your SMS and voice channels — same knowledge base, same persona, same memory.
This guide walks you through building, styling, and shipping a chat widget end-to-end.
30-second walkthrough — create, configure, get embed code, paste into LeadConnector. Auto-loops, no sound needed.
1. Open the Widgets section
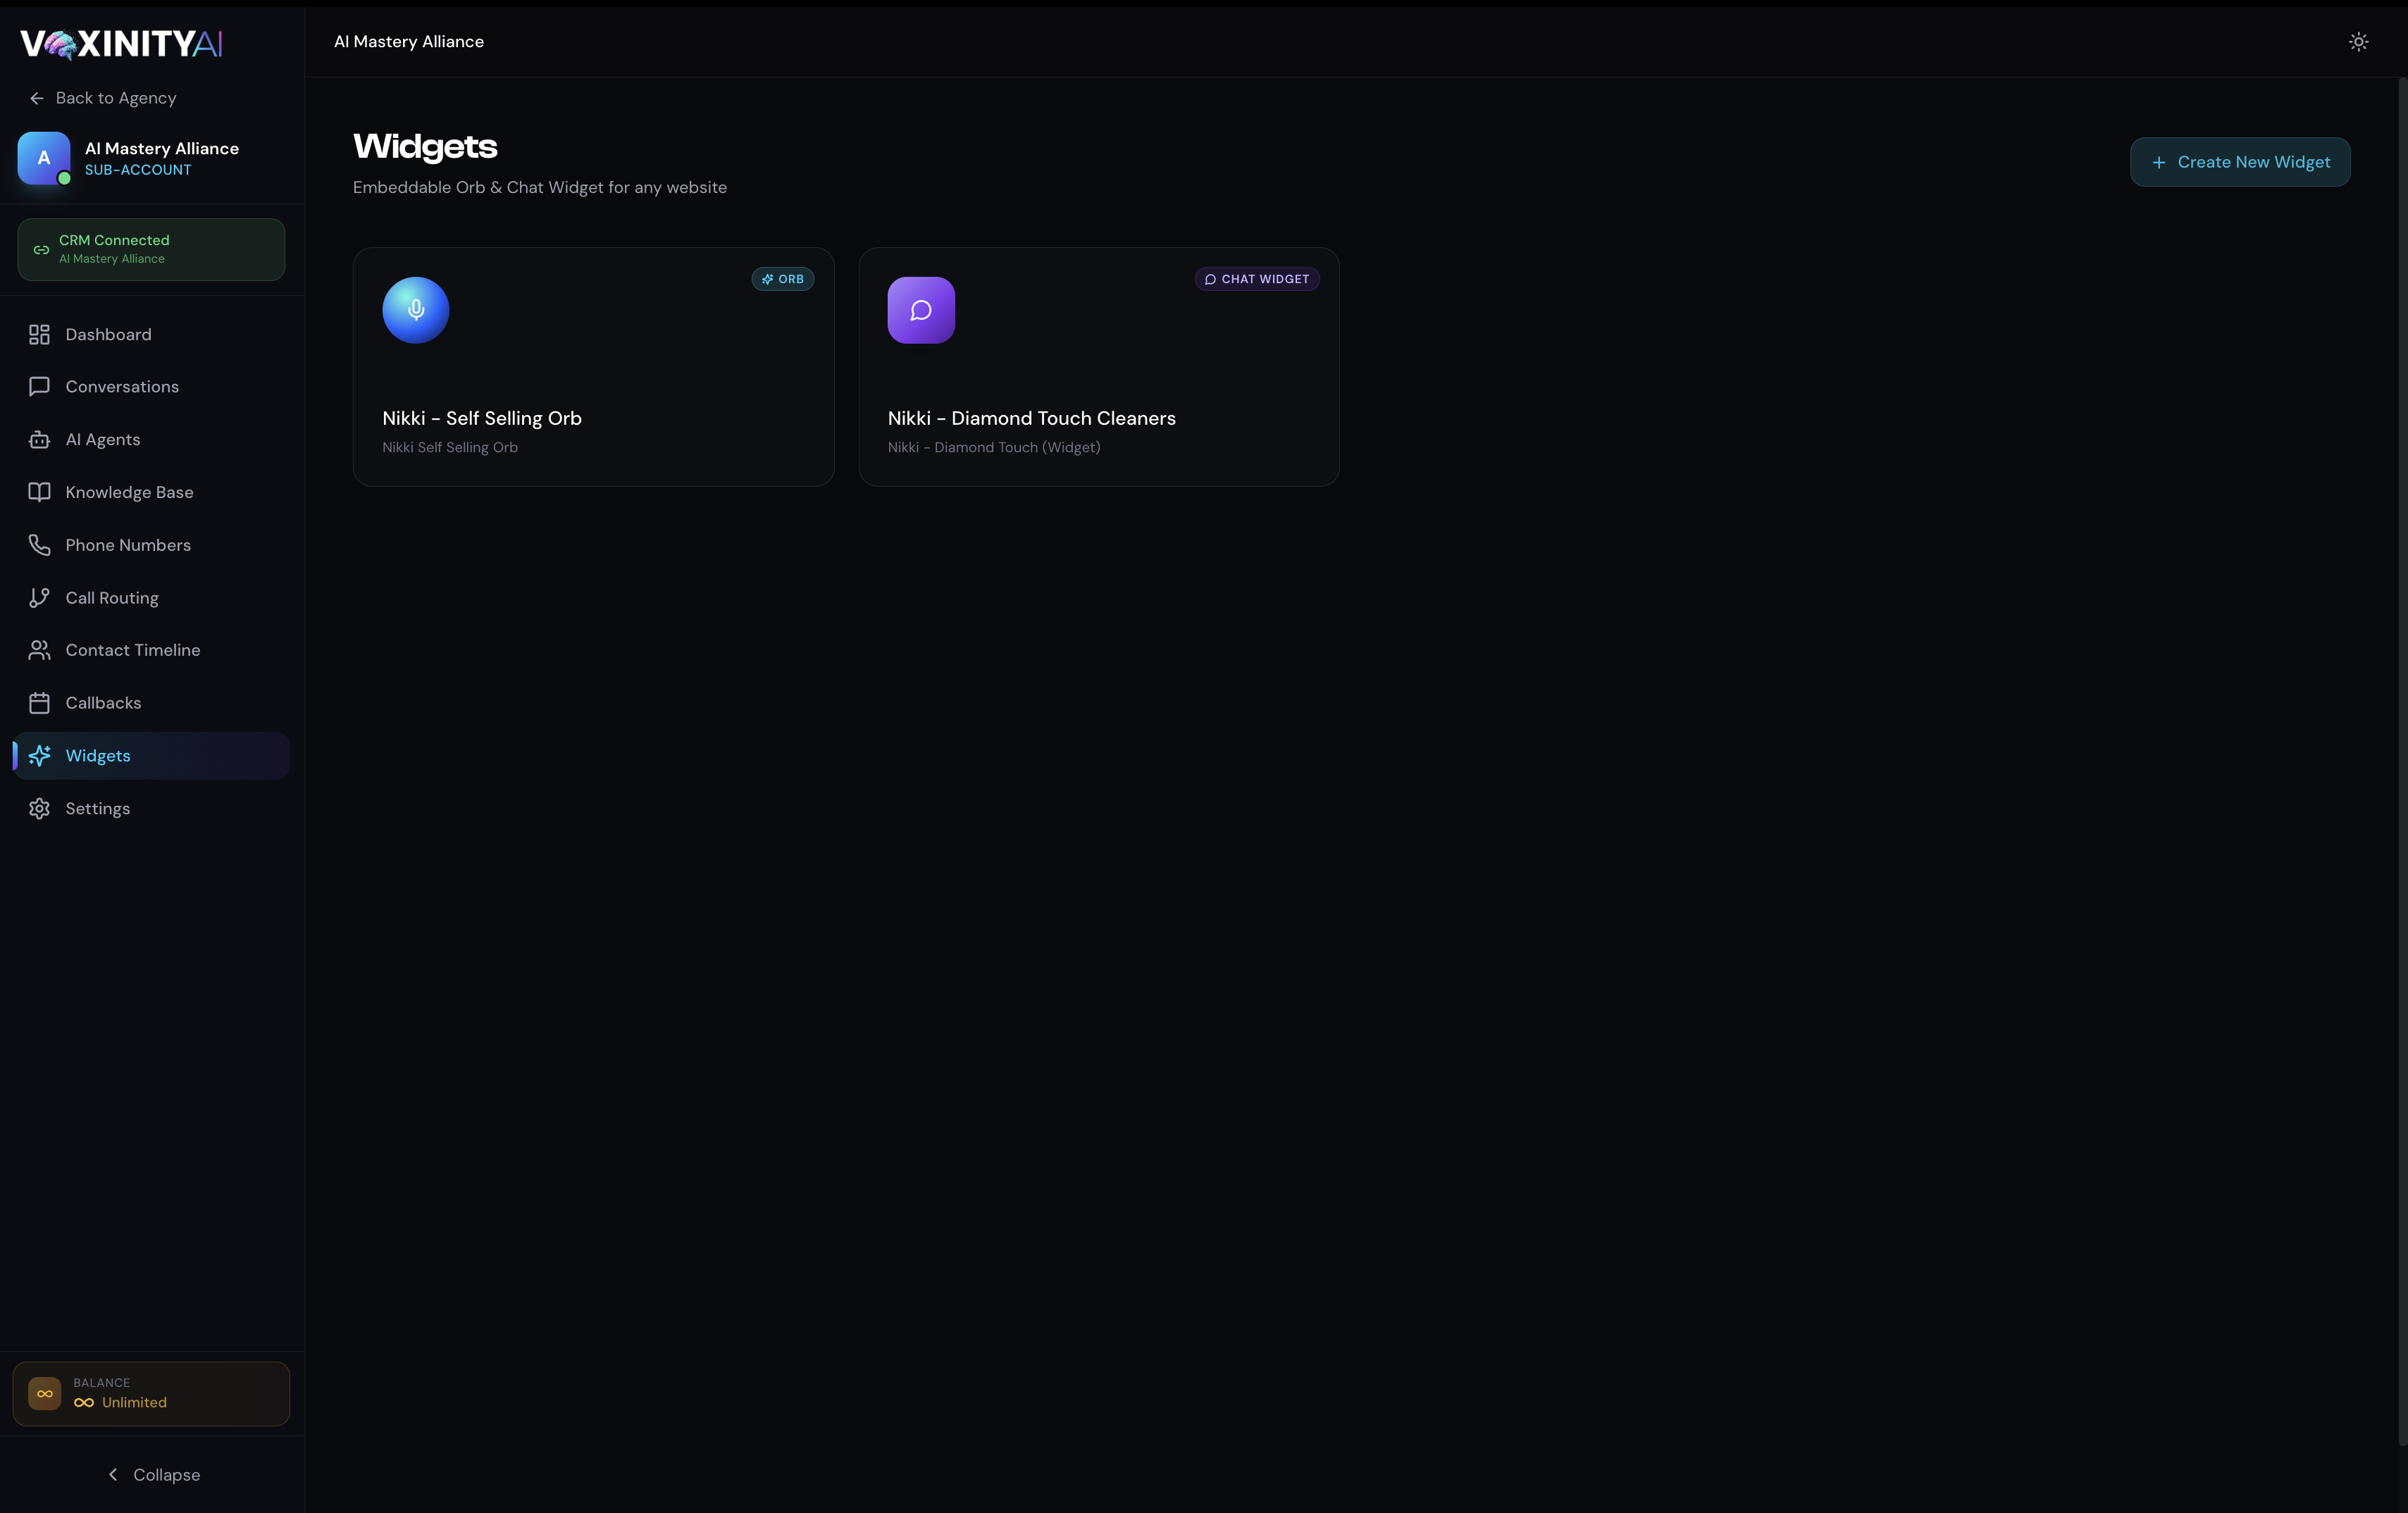
Sub-Account → Widgets. You'll see all your existing widgets (orbs in teal, chat widgets in violet) plus a Create New Widget button in the top-right.
The Widgets hub — manage all your embeddable launchers in one place.
Click Create New Widget → pick Chat Widget from the type chooser. (Voice Orbs use the same flow, but trigger a phone-like voice conversation instead of text.)
2. Configure the widget
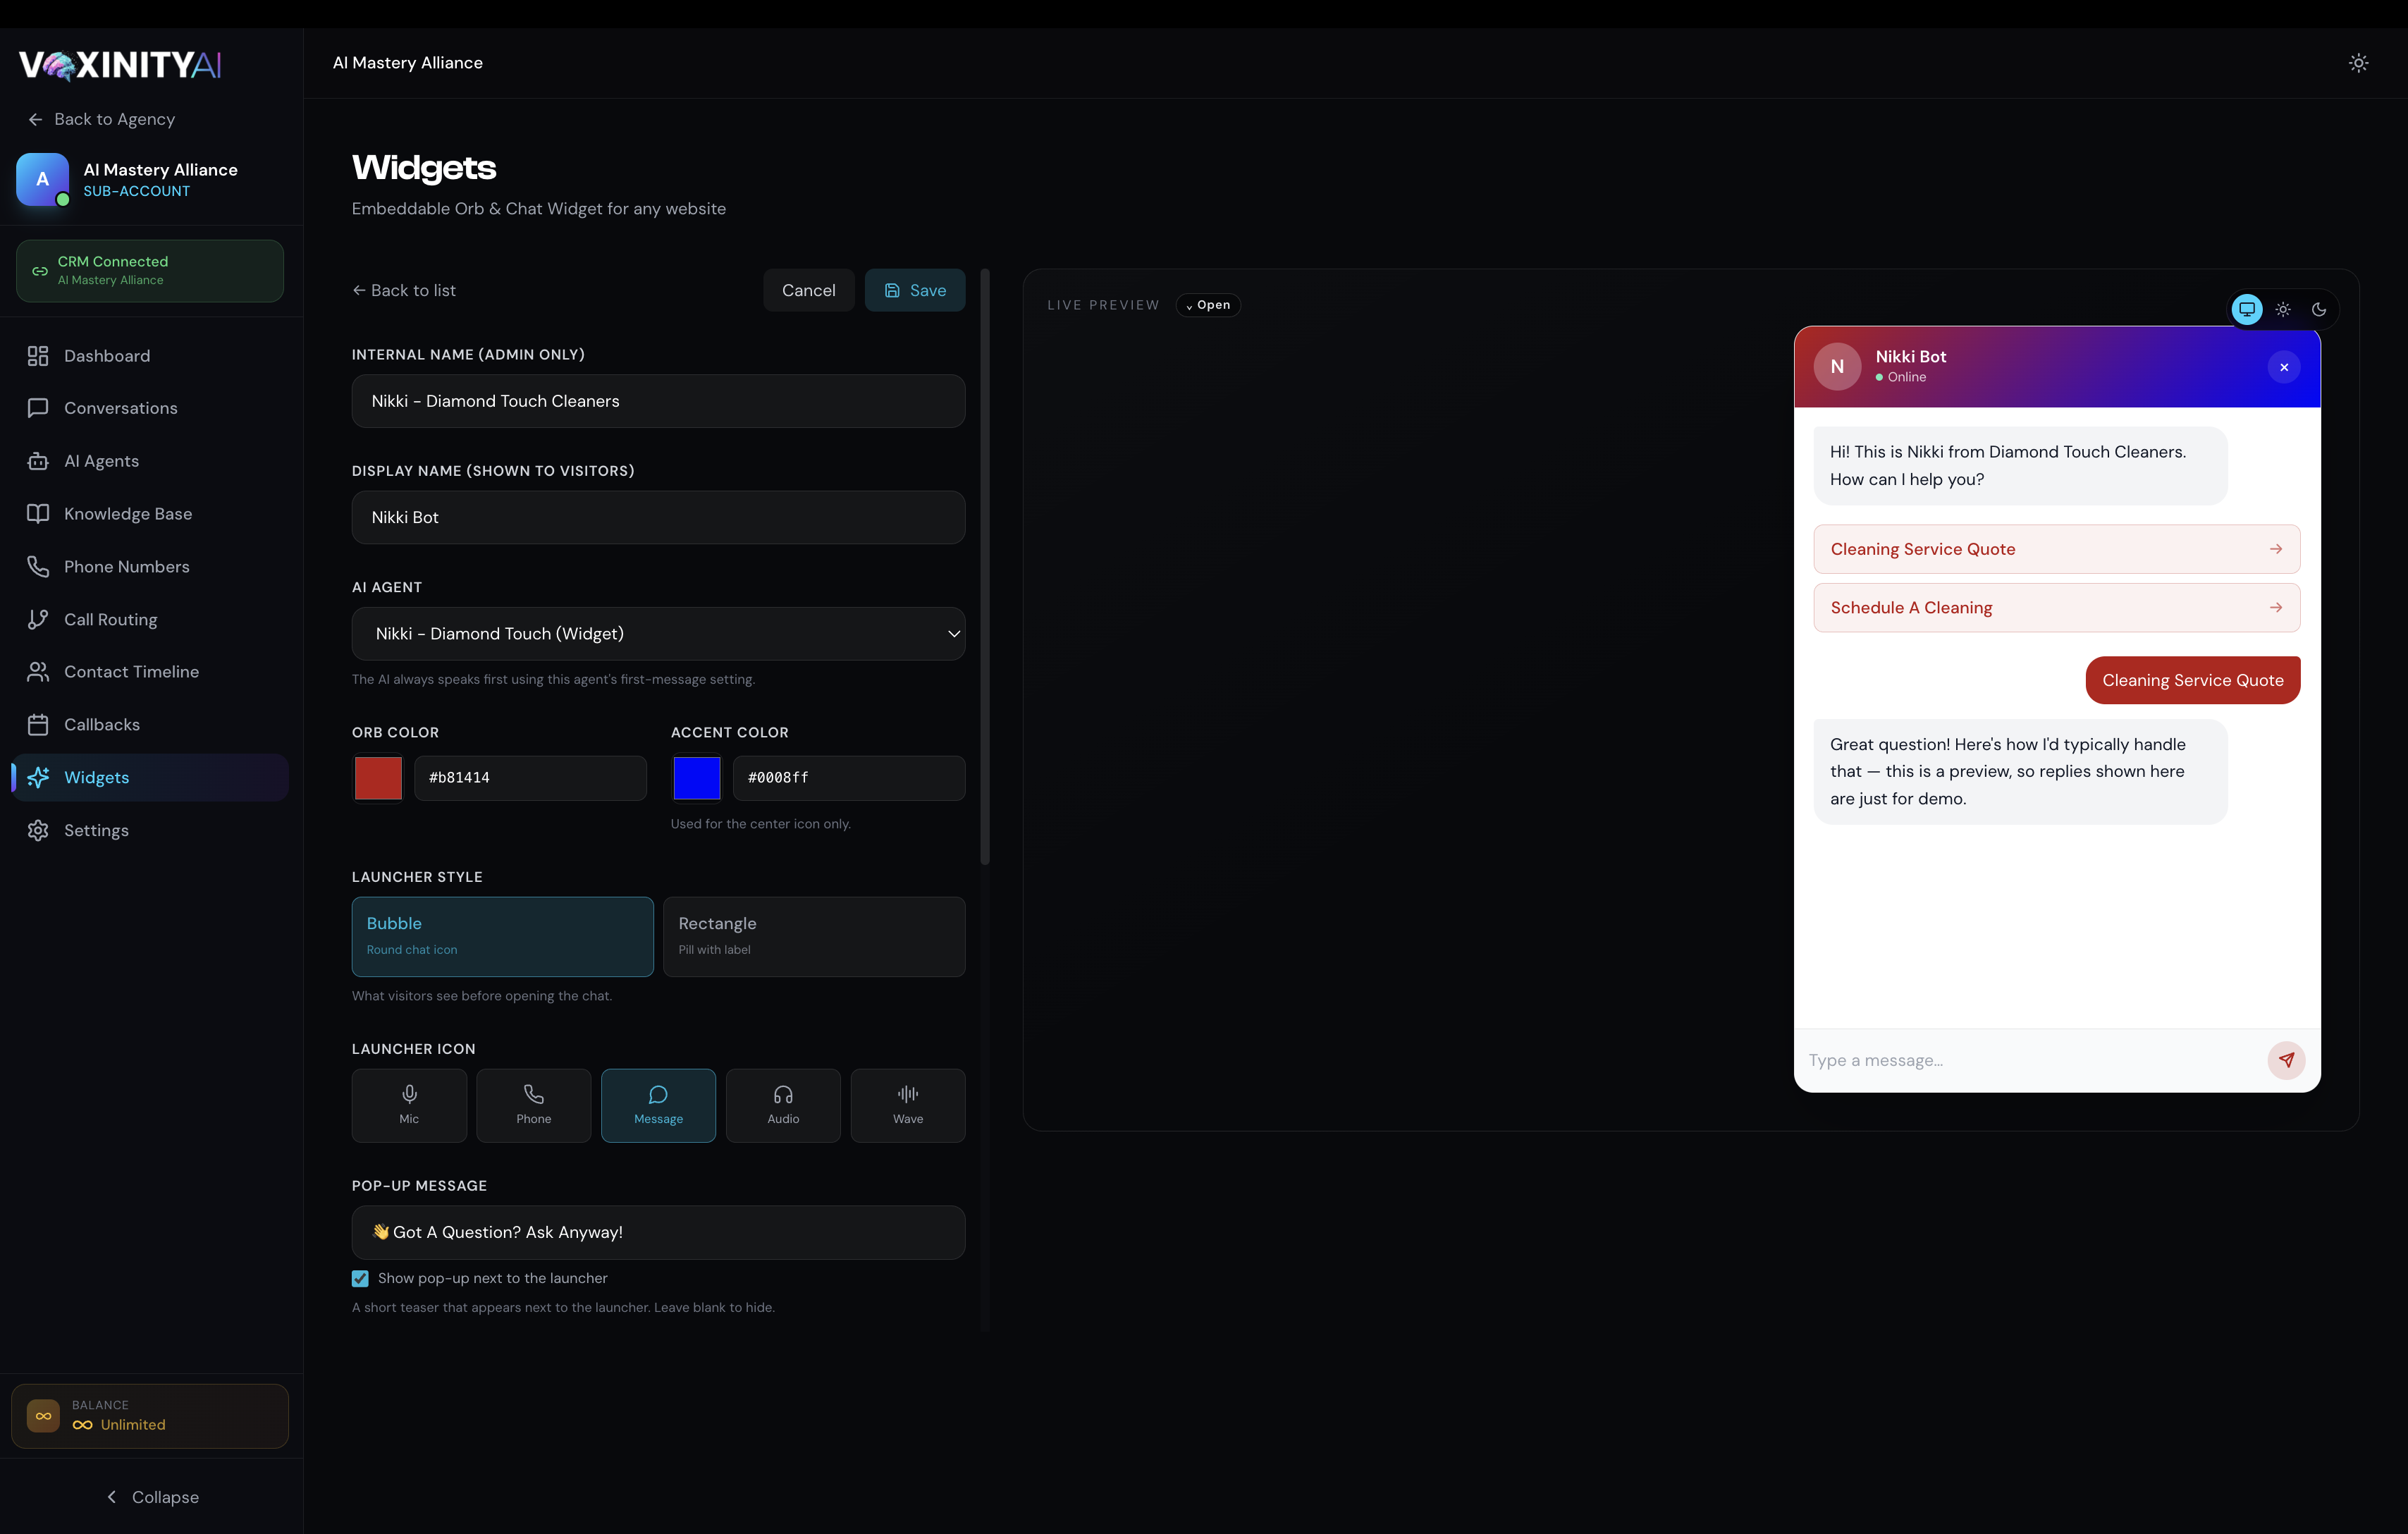
The editor splits the screen 50/50: editor controls on the left, live preview on the right. Every change updates the preview instantly, no save-and-refresh needed.
Top half — identity, agent, colors, and the launcher shape visitors see.
Identity & agent
Internal Name
Admin-only label. Visitors never see this. Use whatever helps you find it in the list (e.g., 'Nikki - Diamond Touch Cleaners').
Display Name
Shown to visitors at the top of the chat panel (e.g., 'Nikki Bot'). Keep it short and friendly.
AI Agent
The chat-enabled agent that handles all conversations from this widget. The agent's first-message is what visitors see when the chat opens.
Colors & launcher
Orb Color
The main brand color — used for the launcher button background, header gradient, suggested-prompt borders, and accent highlights.
Accent Color
Used for the center icon only — adds a subtle pop of contrast against the orb color.
Launcher Style
Bubble = round chat icon. Rectangle = pill-shaped button with a custom label (e.g., 'Chat with us'). Bubble is more compact; Rectangle wins more clicks.
Launcher Icon
Pick from Mic, Phone, Message, Audio, or Wave. Message is the safe default for chat widgets; Mic signals voice-first.
Pick colors that contrast with your site
If your website is mostly white, an orb color like #b81414 (deep red) or #0008ff (vivid blue) gets noticed. Faint pastels disappear. Test it in the live preview's Light/Dark mode toggle before you ship.
3. Welcome, pop-up, and suggested prompts
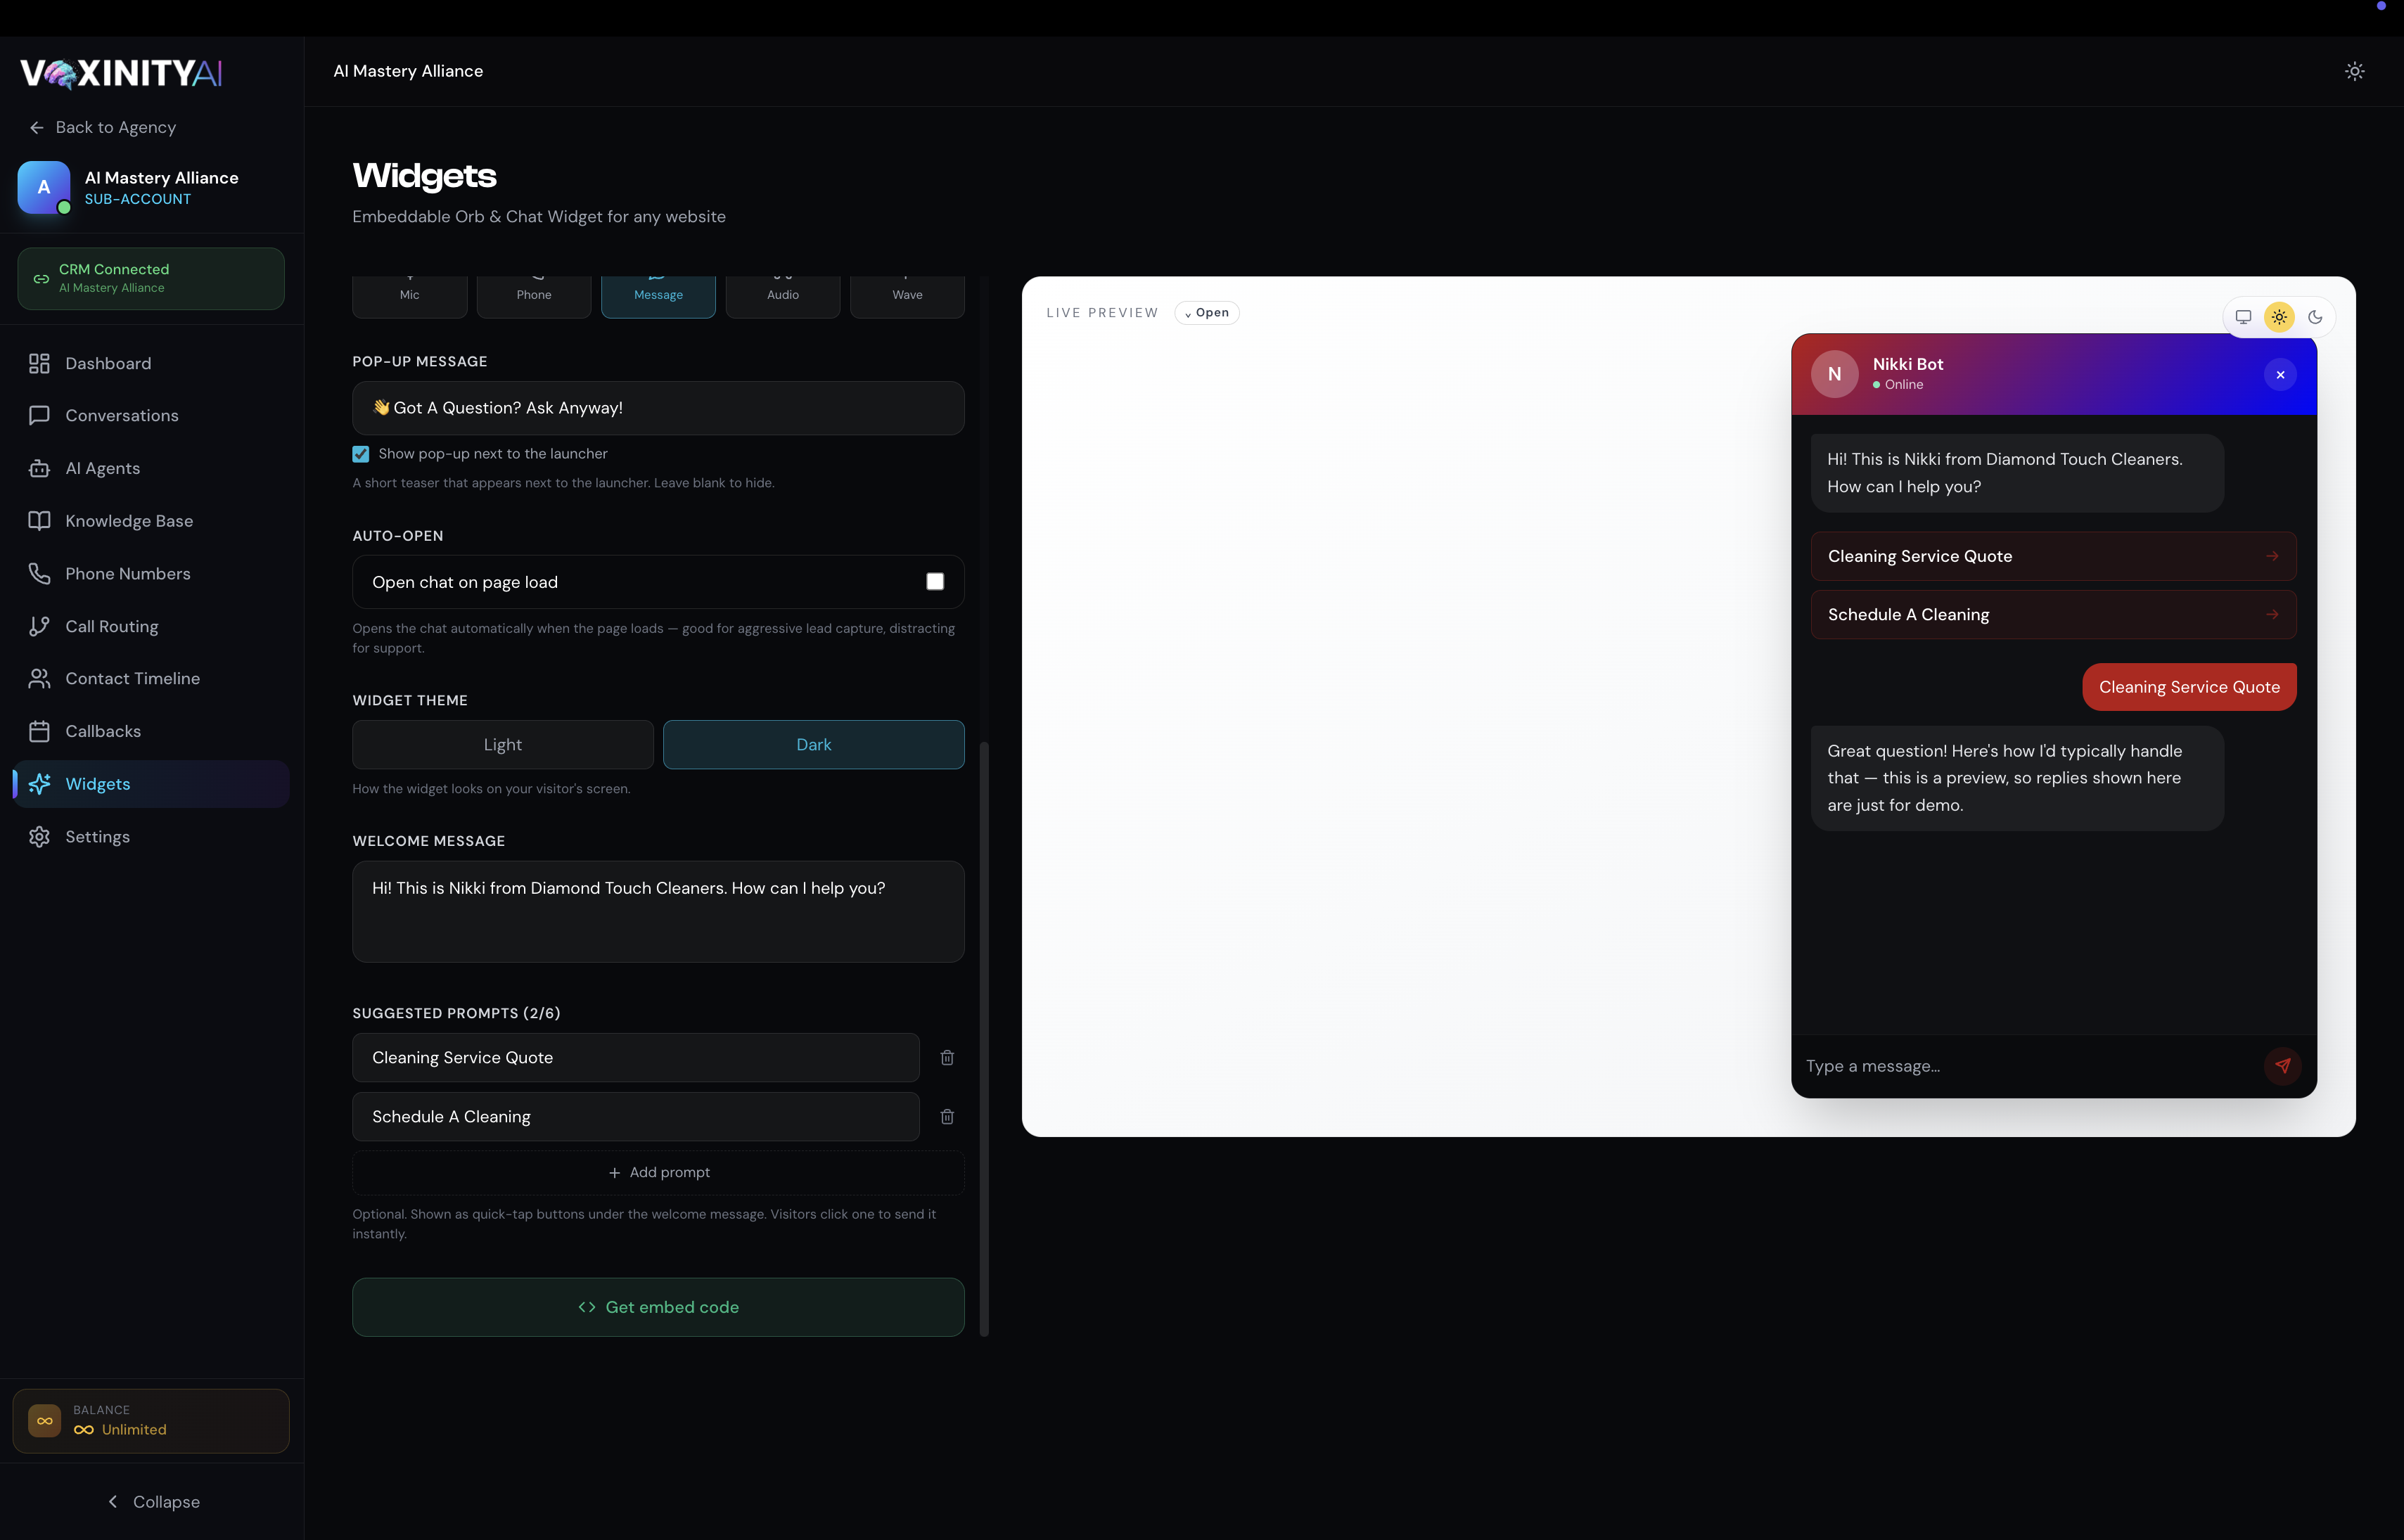
Bottom half — welcome flow, behavior toggles, and quick-tap prompts that nudge visitors into a conversation.
Pop-Up Message
A short teaser that appears next to the closed launcher (e.g., '👋 Got a Question? Ask Anyway!'). Toggle Show pop-up next to the launcher to hide it for a quieter feel.
Auto-Open
If on, the chat opens automatically when the page loads. Great for aggressive lead capture, distracting for B2B support. Default: off.
Widget Theme
Light or Dark — independent of the host page. Pick the one that contrasts best with your site's color palette.
Welcome Message
The first AI message visitors see. Personal + brand-specific works best: 'Hi! This is Nikki from Diamond Touch Cleaners. How can I help you?'
Suggested Prompts
Up to 6 quick-tap buttons under the welcome message (e.g., 'Cleaning Service Quote', 'Schedule A Cleaning'). Visitors click one — it's sent instantly as their first message. Massive conversion lift vs blank text input.
Suggested prompts ≈ 3× more conversations started
Visitors are reluctant to type the first message. Quick-tap prompts remove that friction. Treat them like CTAs — start with the highest-intent action (Get Quote / Book Demo) and the most-common question.
4. Save → Get embed code
Hit Save in the top-right. After saving, scroll to the bottom and click Get embed code.
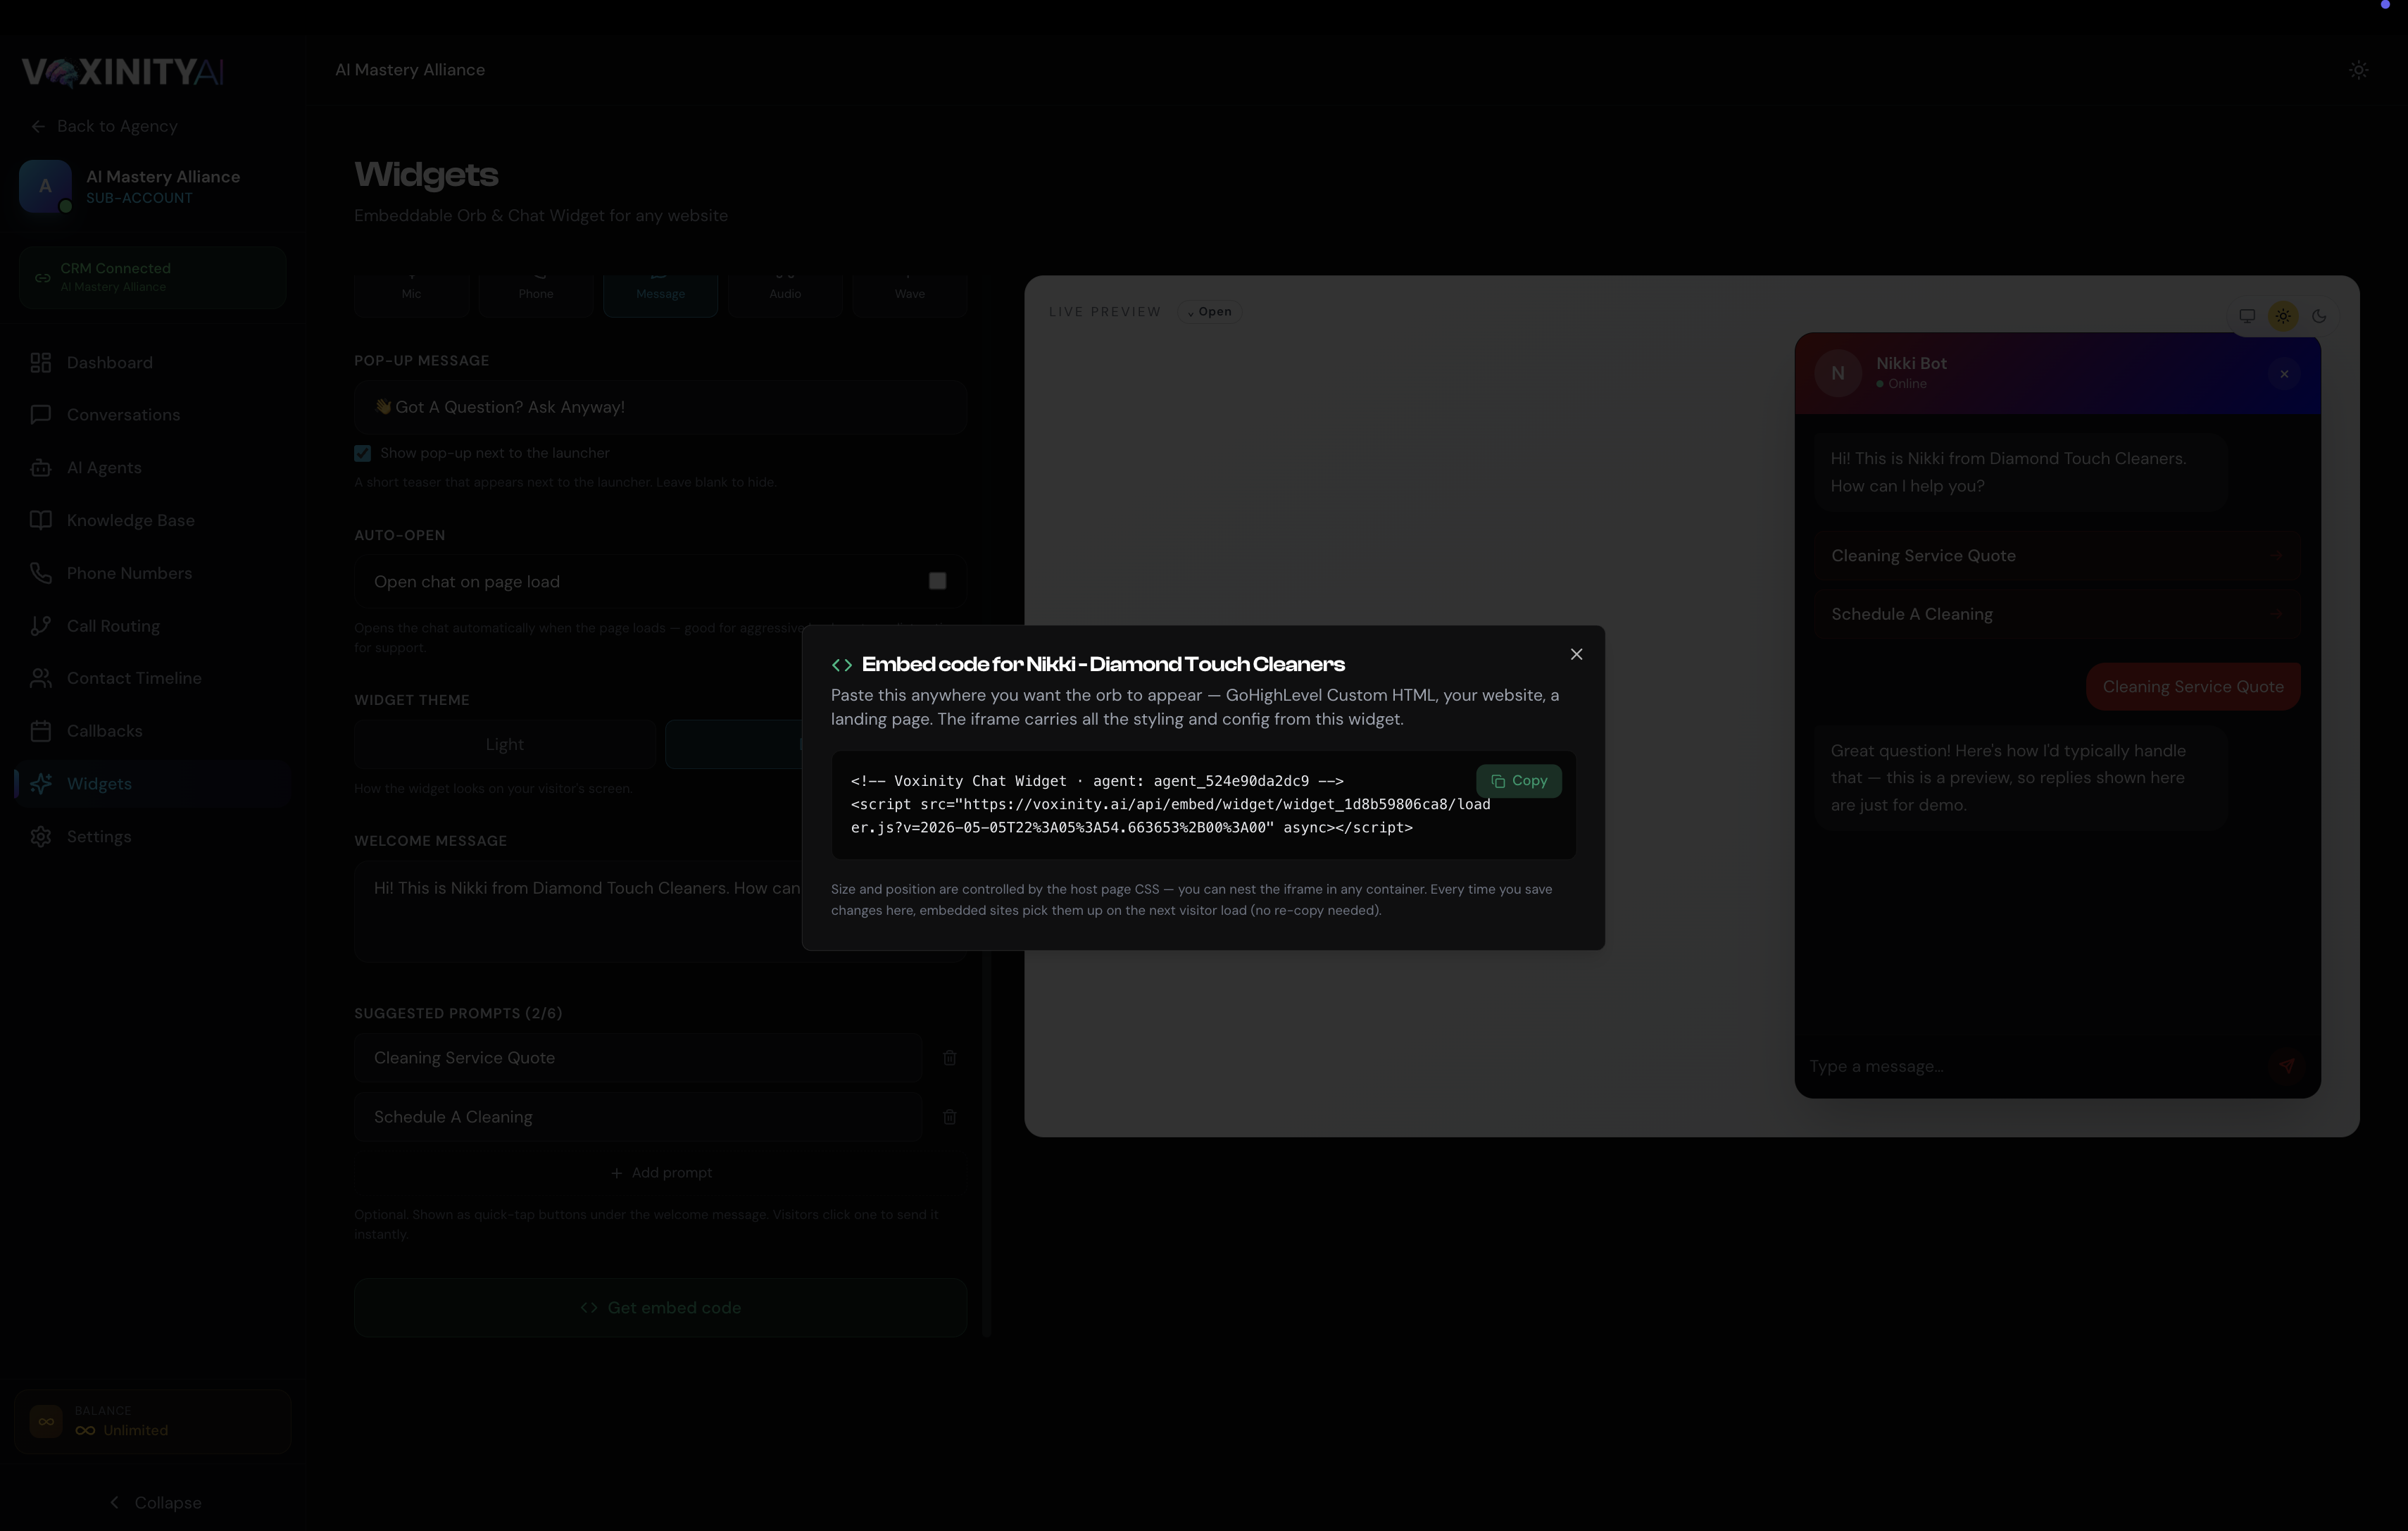
One <script> tag. That's the entire integration.
Click Copy. The script is a single-line tag that loads the widget asynchronously on any page you paste it into. The widget renders itself in a CSS-isolated iframe pinned to the bottom-right, so it won't conflict with your site's styles.
No re-paste on changes
The script always fetches the latest widget config from Voxinity. Change colors, swap the agent, edit the welcome message — your live widget updates on the next visitor's page load. You only paste this code ONCE per site.
5. Paste it into your site
LeadConnector funnels & websites
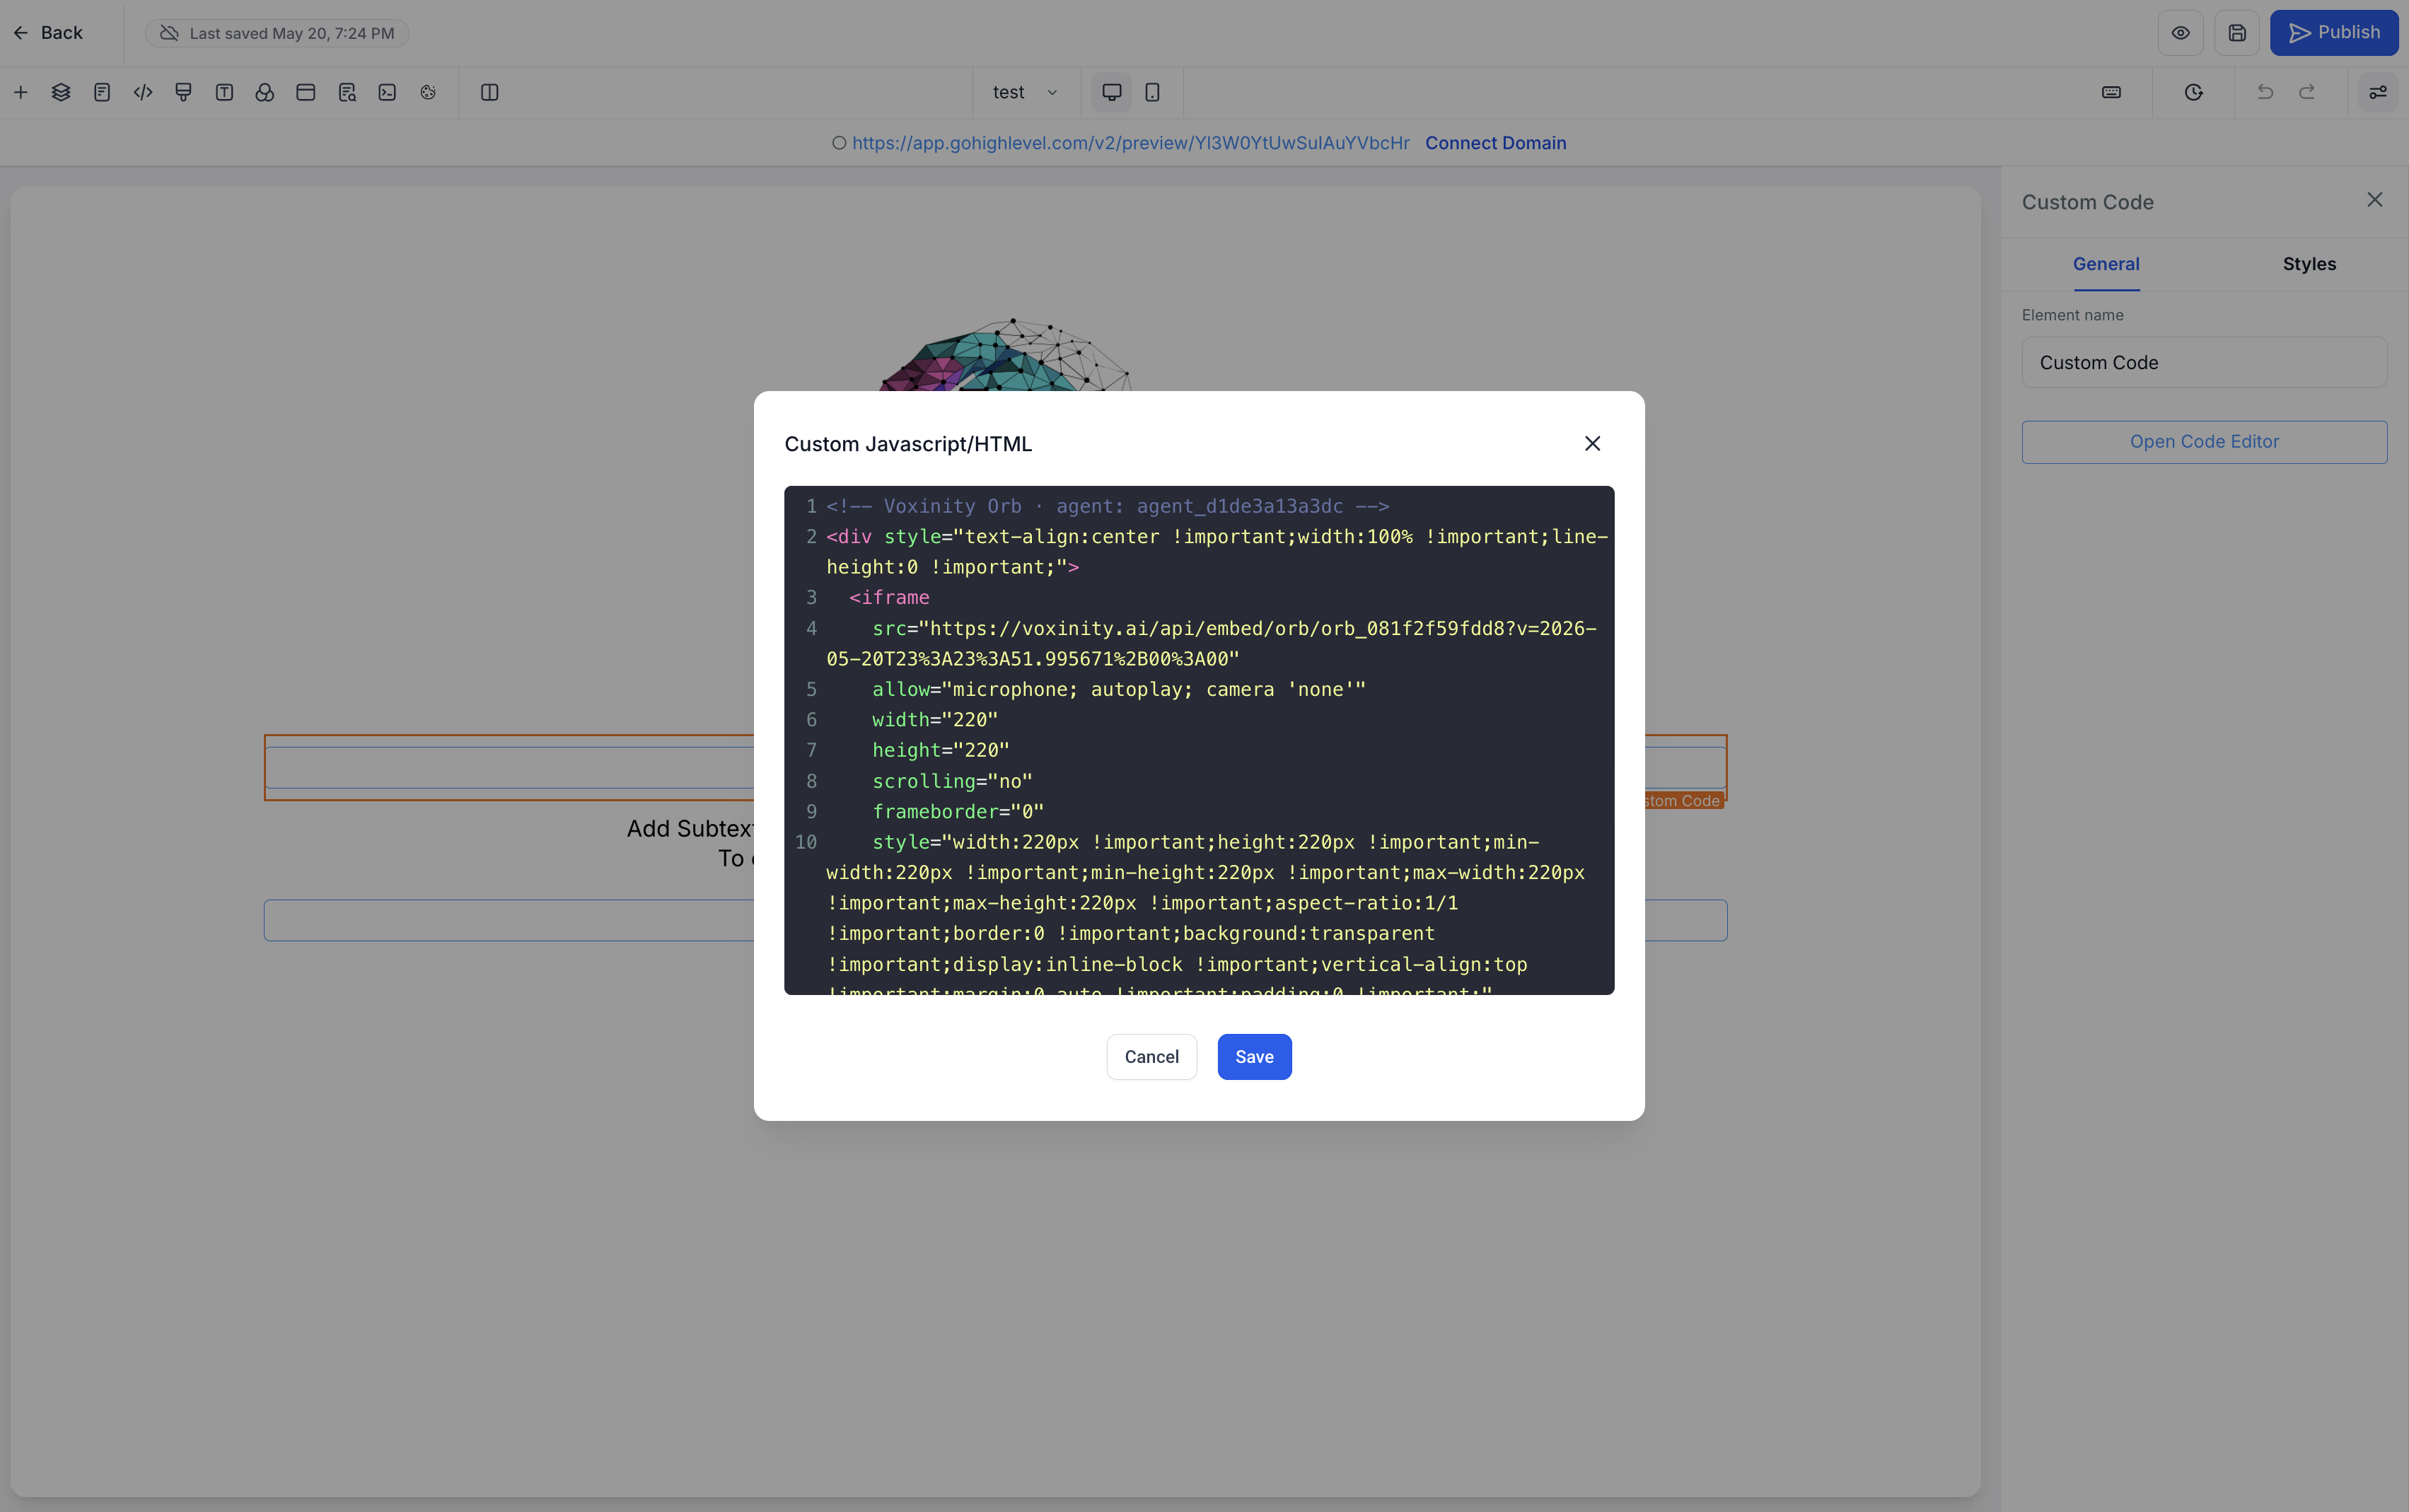
In LeadConnector: drag a Custom Code element onto the page → paste → Save → Publish.
Open the page or funnel in the LeadConnector builder.
Drag a Custom Code element onto the page (or click Settings → Tracking Code → Body to apply site-wide).
Paste the script tag in the Custom JavaScript/HTML editor.
Click Save in the editor, then Publish the page.
Generic HTML / Vanilla site
Paste the script tag right before the closing </body> tag in your HTML. The widget loads after your page content, so it never blocks first paint.
WordPress
Two options: (a) paste into your active theme's footer.php right before </body>, or (b) use a plugin like 'Insert Headers and Footers' → Body → paste → save. Either approach renders the widget on every page automatically.
Webflow
Project Settings → Custom Code → Footer Code → paste → Save → Publish. Webflow injects the script before </body> on every page of the site.
Specific page only?
On WordPress add a Custom HTML block to that one page. On Webflow drop an Embed element. On LeadConnector use the Custom Code element instead of the site-wide Tracking Code section. The widget only appears where you paste it.
6. Verify it's live
Open your site in an incognito/private window (so visitor cookies and your operator session don't conflict).
You should see the launcher in the bottom-right corner within ~1 second of page load.
Click it → the chat panel opens with your Welcome Message + Suggested Prompts.
Click a prompt or type a message → the AI replies using the agent's knowledge base.
Open Sub-Account → Conversations in Voxinity → your test session should appear in real time, marked with the 'Web' channel chip.
7. Common issues & fixes
Troubleshooting
Widget doesn't appear
(1) Hard-refresh the page (Ctrl+Shift+R) to bypass cache. (2) Open browser DevTools → Console — look for a 'voxinity' load error. (3) Confirm the script tag is INSIDE the <body> not <head>. (4) If LeadConnector — make sure you clicked Publish, not just Save.
Widget appears but the chat won't open
Check that your AI Agent has Chat Assistant enabled (Channels tab → CHAT ENABLED). A widget with a chat-disabled agent shows the launcher but blocks the open.
Colors look wrong
Make sure you saved the widget. Open the editor → verify the orb color + accent values match what you expected. Live preview is authoritative — what you see there is what visitors see.
Suggested prompts don't show
Confirm at least one is saved (badge shows 'Suggested Prompts (1/6)' or higher). Empty list = no quick-tap buttons rendered.
Visitors can't be tracked in CRM
If your agent has LeadConnector connected, the widget automatically creates/upgrades a contact the moment a visitor shares an email or phone number. Before that, they show in Conversations as 'Anonymous visitor #N' — that's expected.
What's next?
Now that the widget is live, enable Switch to SMS on your chat agent so visitors who share their phone can continue the conversation on text — covered in the Chat Assistant Complete Guide. Also consider adding the same widget to your funnel pages for instant lead engagement.